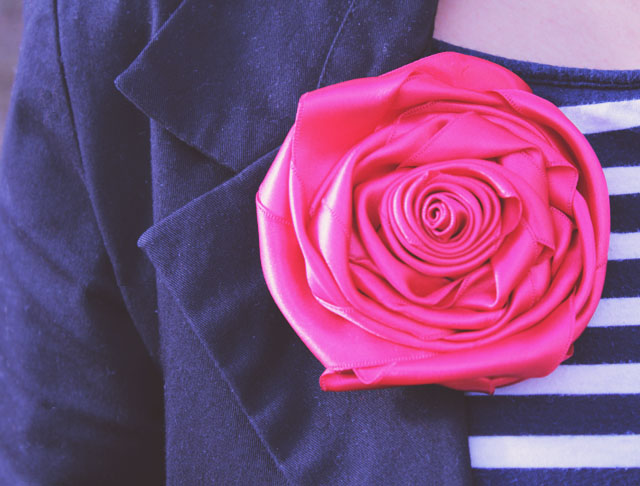
Desde hace mas de dos años empece a hacer Joyeria con Cintas. Y de las Cintas me gusta como puedes jugar con ellas, doblarlas, asegurar formas con hilo, aguja, pegante, como se puede jugar con los colores y texturas. Es divertido y cuando hago una rosa con cinta me olvido de todo!
Hoy les dejo este tutorial de un Hermoso prendedor que hice con cintas.
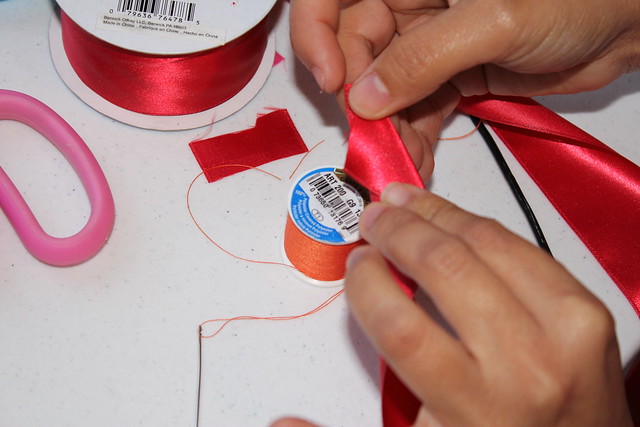
Materiales
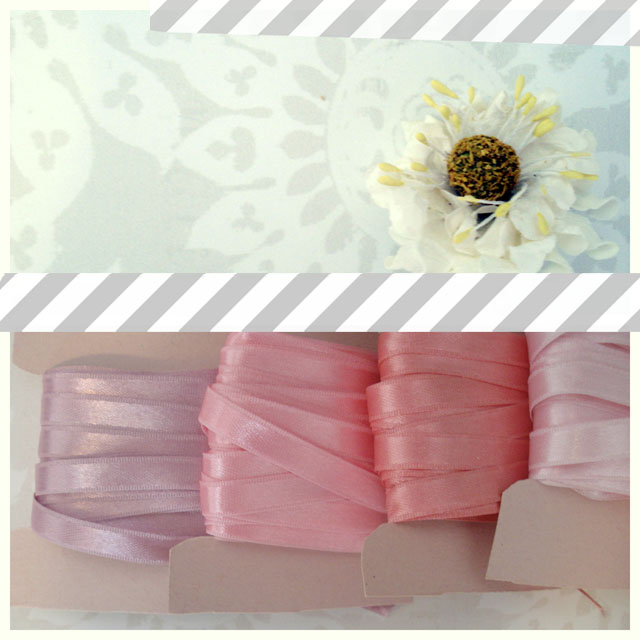
80 cms de Cinta de satin de 4 cm de ancho ( 1 yarda de longitud x 1.57 pulgadas de ancho)
1 hoja de Fieltro del mismo color de la cinta para la tapa
Hilo Rojo
Cartulina para hacer el molde de la tapa de la rosa
Pistola de Silicona
Aguja comun
Cinta Metrica
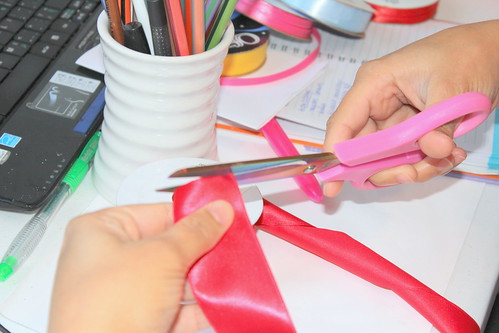
Tijeras
Broche base
Hoja de Fieltro color Rojo
Instrucciones
1. Se cortan aproximadamente 80 cms de la cinta o mejor aun, no cortes la cinta hasta que logres el
tamaño deseado. (En mi caso no lo corte)
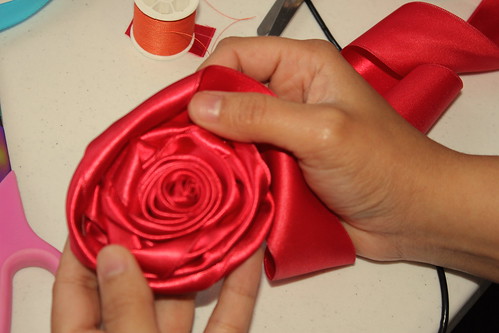
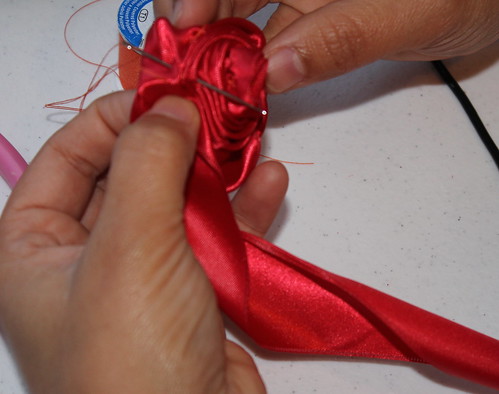
2. De el extremo de tu cinta hace un primer pliegue con un angulo de 90 grados.
3. Se empieza a hacer un rollo alrrededor del pliegue hasta que este alcance 1 cm de diametro en esta
sera la base de la flor y se dejara muy poco espacion entre una capa y la siguiente.
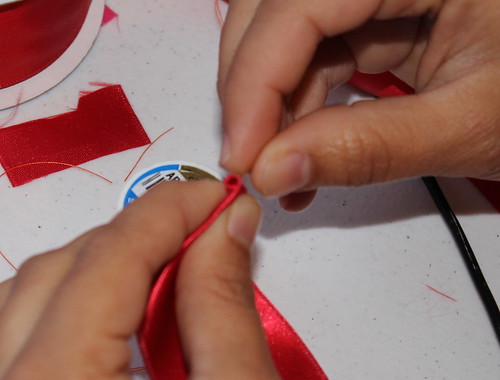
4. Se asegura la forma de la flor cosiendo a mano con aguja e hilo.
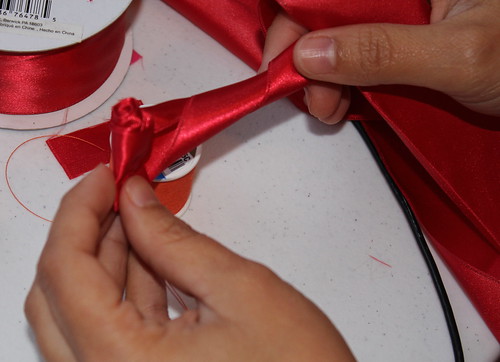
5. se se sigue realizando el mismo rollo, progresivamente mas suelto y asi ira tomando la forma de una
rosa. Se agregan los bucles y las formas que tiene una Rosa (Empieza a jugar con la cinta). Es
importante que ha medida que se va enrollando se vaya asegurando con
aguja e hilo haciendo puntadas.
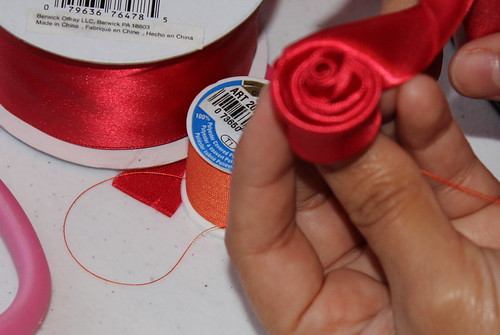

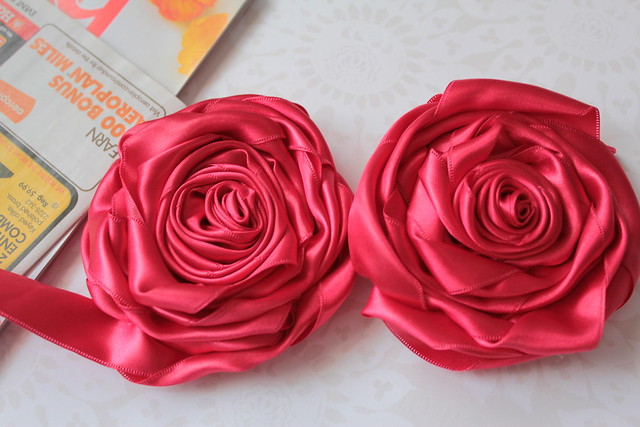
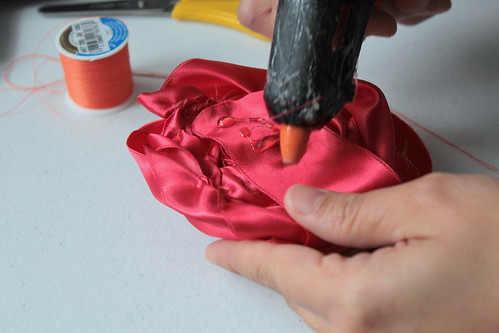
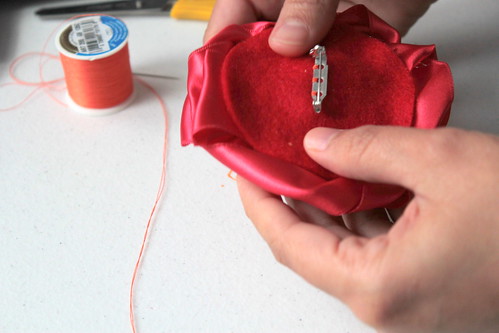
6. Luego de terminada la rosa en el tamaño elegido, procedemos a cortar un circulo un poco mas
pequeño que el diametro de la Flor y se cose el prendedor (Observa el circulo de fieltro en la cuarta
foto a partir de aqui).
7. Luego se pega con silicona y listo!
---------------------------------------------------------------------------------------------------------------------
Since 2009 I started making Ribbon Jewellery. I have the opportunity of playing with shapes, color, textures, just tying them up with hot glue, threads and needles. It's one of my hobbies. When I make a Rose Ribbon I forget everything around me.
Today I've posted a Tutorial. DIY!
Materials and Tools
1 Yard (90 cms=) and 1.57-inch (4 cm) Red satin Ribbon.
Red thread and needle.
Glue Gun
Scissors
Bottom of the Rose
Red felt square
Brooch Base
1. Cut a piece of Ribbon that is 90 cm. (It's better to trim the length once your flower your flower is
done.
2. Fold the Ribbon downwards 90 degree angle
3. Start Rolling the center into a tight roll and use a needle and thread to sew the roll.
4. Then start wrapping the Ribbon and continue making your Rose and sewing the pieces together,
adding stitches at the bottom. Until the Rose is in the correct size.
Bottom of the Rose
Draw a rounded paper pattern smaller than the bottom of our flower, then put it onthe the felt square and start cutting it out with scissors.
Sew your brooch base on the the rounded felt and attach the two pieces with hot glue, and it's ready your Rose.
Do you like hand-made Jewellery .
Which materials you do prefer?
Have a Good week!