miércoles, 28 de diciembre de 2011
Mi año en fotos!
Enero: En la casa hibernando y jugando en el kinetic, sali un dia al patio de mi casa a tomar esa foto.
Febrero: Ahorrando para mi viaje a colombia.
Marzo: Hice algunas diademas y las vendi a conocidos.
Abril: fui de vacaciones a mi pais y compre muchas pepitas para mis collares.
Mayo: Hice esa corona en mulberry paper para la primera comunion de la hija de mi amiga Piedad!
Junio: Disfrute del sol y comi mucho helado de raspberry cheesecake con Gárgamel
Julio: Absorbi la energia del sol y tome muchas fotos junto al mar.
Agosto: Segui haciendo salidas pequeñas y tome fotos.
Septiembre: Hice varios collares y me encante combinando el color turquesa con el fucsia.
Octubre: Empezamos a organizarnos para cambiar de ciudad.
Septiembre: Disfrutando el otoño y al final del mes empece el Minicurso de Navidad de Jackie Rueda y lo disfrute mucho.
Diciembre: Aplique muchas de las cosas que aprendi en el curso y fue el mes mas productivo, empece a estudiar de nuevo, y comparti con amigos las fechas especiales!
jueves, 22 de diciembre de 2011
Gifts for Christmas
Hola, dejo mas ideas para regalar en estas fechas!!
Gifts!! by tinilla featuring a black fedora hat
I think I would like to receive all these stuff for Christmas!!
Publicar entrada
I think I would like to receive all these stuff for Christmas!!
Publicar entrada
viernes, 16 de diciembre de 2011
Esta semana. This Week
Hoy decidi compartir algo del trabajo que hice esta semana, hice algunos collares en perlas, alambre y cinta uno que otro anillo y tome una que otra fotografia.
Espero hayan tenido una bonita semana como la que he tenido yo, les deseo que descansen mucho, y que estos 15 dias que quedan de este año hagan disfruten, paseen, celebren y compartan!
martes, 13 de diciembre de 2011
Jewelry Holder, Un Marco para tus Collares
Desde hace mas de dos años mis collares y aretes eran un completo desorden, asi que resolvi arreglar todo hacer este hermoso mostrador de joyeria.
Lo tengo en mi habitacion junto al Closet y cuando me visto ya no me da pereza buscar el accesorio perfecto luego de vestirme ! ya que los tengo a la vista. La verdad lo disfruto porque es hermoso visualmente y muy practico.
Materiales
Una tabla con marco (ya pintada)
Papel de scrapbooking
Pegante/Pistola de Silicona
Martillo
Tus Collares y Aretes preferidos.
Pega el papel con la silicona en el fondo de la tabla.
Pon las puntillas
Clava los clavos en la parte superior y amarra el nylon.
Pon los pequeños clavos donde quieras colocar tus joyas.
Disfruta!
-------------------------------------------------------------------------------
My Earrings and necklaces were a a mess, but I decided to organize them in a Beautiful Jewelry Frame. Now I have it in my Bedroom and my accessories are easily available before leaving home.
Materials
An old frame painted
Common Nails
Scrapbooking Paper
Hot Glue gun
Glue the paper at the bottom of the frame.
Put nails on the back of the frame and tie the nylon.
Put the nails where you want to hang up your Jewelry.
Quieres mas ideas? Mira aca: brooklynlimestone, curbly.
Cintas Washi tapes de plugypixel.
lunes, 12 de diciembre de 2011
Ideas para regalar
Cosas lindas que uno encuentra por Internet que puedes regalar. Yo me muero por esta batidora turquesa, y por los zorros!!
Que quieres para esta Navidad?
-------------------------------------------------------------------------------
Beautiful gifts for your family and friends. Look at the mixer it's so special I'm going to cry. No next year I have to have it.
What do you want for Christmas?
jueves, 8 de diciembre de 2011
Happy Christmas
Hoy les dejo esta hermosa corona que hice para esta Navidad. Si quieren ver hermosas fotos de Navidad deseon una vuelta por La Vuelta al Mundo en Flickr para que se inspiren.
He estado un poco ocupada esta semana pero con muchos proyectos e ideas en la cabeza, para el proximo año, termine el curso de navidad, hice un curso de como hacer un portafolio de trabajo, sali a pasear el fin de semana y hasta hoy Jueves!!
Corona Navideña
Materiales
Corona de ramas
Pintura Blanca
Guirnalda plateada
Papel Fieltro Gris
Adorno de arbol Navideño
Tijeras
Brocha
Alambre
Pistola de Silicona
Pintamos la corona con la pintura blanca la dejamos secar unas tres horas.
Luego envolvemos la guirnalda y la aseguramos.
Hacemos las flores con el papel fieltro como se muestra en la foto.
Añadimos los adornos que queremos y los fijamos con alambre de manera que no se vean.
A disfrutarlo por el tiempo que quieras que dure tu navidad!
This week has been too busy, I completed two courses Photography and Preparation for a Job Interview. Last weeked I went with frijol to visit some friends and todays is Thursday and I just posted this DIY. But I enjoyed all the afternoon organizing my pictures!
I hope you enjoy your Christmas!!
Christmas Wreath
Materials and Tools
Natural branches Christmas Wreath
White paint
Grey felt square
Christmas tree ornaments
Scissors
Hot Glue gun
Wire
Directions
1. We have to paint the wreath with White acrylic painter.
2. Wrap the garland on the wreath.
3. Make flowers with the felt square.
4. Attach the ornaments with wire and hot glue.
5. Enjoy your Christmas!!!
When I made the Wreath I listened:
MERRY CHRISTMAS ( DON’T WANT ... - ASOBI SEKSU
THE COLDEST DAY IN THE WORLD - ALASKA IN WINTER
WHITE CHRISTMAS - BOB MARLEY
What do you like about Christmas?
viernes, 2 de diciembre de 2011
Dipticos
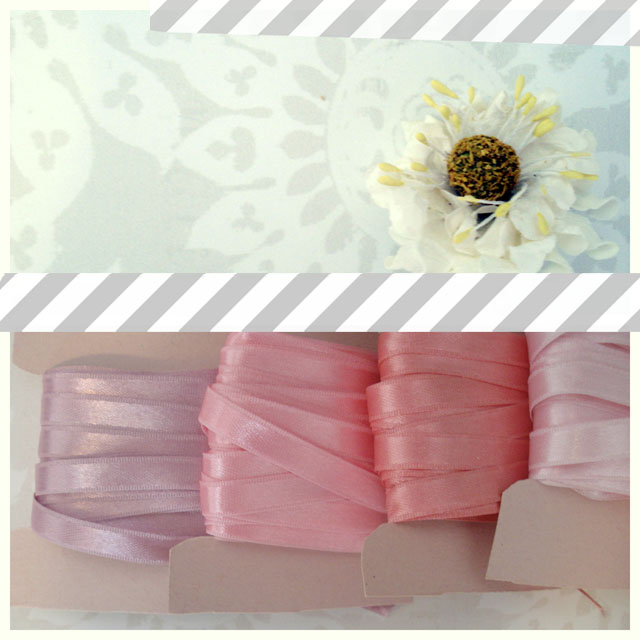
Despues de una semana un poco dura dejo las fotos que subi en Octubre para la vuelta al mundo, el tema Dipticos! Espero hayan tenido una bonita semana como la tuve yo en mi curso de Fotografia de Navidad de Jackie Rueda.
-------------------------------------------------------------------------------------------
After a hard week I post today two pictures that I left on La Vuelta al Mundo Photographic club! October Topic. I have a wonderful week studying Christmas Photography.
I hope you did well this week !!!
Visit: La Vuelta al Mundo en Flickr
My picture's strips are from puglypixel
miércoles, 30 de noviembre de 2011
Ribbon Rose Pin
Desde hace mas de dos años empece a hacer Joyeria con Cintas. Y de las Cintas me gusta como puedes jugar con ellas, doblarlas, asegurar formas con hilo, aguja, pegante, como se puede jugar con los colores y texturas. Es divertido y cuando hago una rosa con cinta me olvido de todo!
---------------------------------------------------------------------------------------------------------------------
Since 2009 I started making Ribbon Jewellery. I have the opportunity of playing with shapes, color, textures, just tying them up with hot glue, threads and needles. It's one of my hobbies. When I make a Rose Ribbon I forget everything around me.
Today I've posted a Tutorial. DIY!
Materials and Tools
1 Yard (90 cms=) and 1.57-inch (4 cm) Red satin Ribbon.
Red thread and needle.
Glue Gun
Scissors
Bottom of the Rose
Red felt square
Brooch Base
1. Cut a piece of Ribbon that is 90 cm. (It's better to trim the length once your flower your flower is
done.
2. Fold the Ribbon downwards 90 degree angle
3. Start Rolling the center into a tight roll and use a needle and thread to sew the roll.
4. Then start wrapping the Ribbon and continue making your Rose and sewing the pieces together,
adding stitches at the bottom. Until the Rose is in the correct size.
Bottom of the Rose
Draw a rounded paper pattern smaller than the bottom of our flower, then put it onthe the felt square and start cutting it out with scissors.
Sew your brooch base on the the rounded felt and attach the two pieces with hot glue, and it's ready your Rose.
Do you like hand-made Jewellery .
Which materials you do prefer?
Have a Good week!
Hoy les dejo este tutorial de un Hermoso prendedor que hice con cintas.
Materiales
80 cms de Cinta de satin de 4 cm de ancho ( 1 yarda de longitud x 1.57 pulgadas de ancho)
1 hoja de Fieltro del mismo color de la cinta para la tapa
Hilo Rojo
Cartulina para hacer el molde de la tapa de la rosa
Pistola de Silicona
Aguja comun
Cinta Metrica
Tijeras
Broche base
Tijeras
Broche base
Hoja de Fieltro color Rojo
Instrucciones
1. Se cortan aproximadamente 80 cms de la cinta o mejor aun, no cortes la cinta hasta que logres el
tamaño deseado. (En mi caso no lo corte)
3. Se empieza a hacer un rollo alrrededor del pliegue hasta que este alcance 1 cm de diametro en esta
5. se se sigue realizando el mismo rollo, progresivamente mas suelto y asi ira tomando la forma de una
rosa. Se agregan los bucles y las formas que tiene una Rosa (Empieza a jugar con la cinta). Es
importante que ha medida que se va enrollando se vaya asegurando con
aguja e hilo haciendo puntadas.
rosa. Se agregan los bucles y las formas que tiene una Rosa (Empieza a jugar con la cinta). Es
importante que ha medida que se va enrollando se vaya asegurando con
aguja e hilo haciendo puntadas.
6. Luego de terminada la rosa en el tamaño elegido, procedemos a cortar un circulo un poco mas
pequeño que el diametro de la Flor y se cose el prendedor (Observa el circulo de fieltro en la cuarta
foto a partir de aqui).
pequeño que el diametro de la Flor y se cose el prendedor (Observa el circulo de fieltro en la cuarta
foto a partir de aqui).
7. Luego se pega con silicona y listo!
---------------------------------------------------------------------------------------------------------------------
Since 2009 I started making Ribbon Jewellery. I have the opportunity of playing with shapes, color, textures, just tying them up with hot glue, threads and needles. It's one of my hobbies. When I make a Rose Ribbon I forget everything around me.
Today I've posted a Tutorial. DIY!
Materials and Tools
1 Yard (90 cms=) and 1.57-inch (4 cm) Red satin Ribbon.
Red thread and needle.
Glue Gun
Scissors
Bottom of the Rose
Red felt square
Brooch Base
1. Cut a piece of Ribbon that is 90 cm. (It's better to trim the length once your flower your flower is
done.
2. Fold the Ribbon downwards 90 degree angle
3. Start Rolling the center into a tight roll and use a needle and thread to sew the roll.
4. Then start wrapping the Ribbon and continue making your Rose and sewing the pieces together,
adding stitches at the bottom. Until the Rose is in the correct size.
Bottom of the Rose
Draw a rounded paper pattern smaller than the bottom of our flower, then put it onthe the felt square and start cutting it out with scissors.
Sew your brooch base on the the rounded felt and attach the two pieces with hot glue, and it's ready your Rose.
Do you like hand-made Jewellery .
Which materials you do prefer?
Have a Good week!
jueves, 24 de noviembre de 2011
Fall Photograhies
Hoy subo unas hermosas fotos de otoño, resulta que tenia una cita para buscar trabajo el Viernes pasado y mi esposo me llevo a la oficina pero como aun no manejo en Fredericton, tuve que caminar 4 kilometros de regreso a la casa, con la ayuda de mi IPOD y de Instagram mi travesia fue magica!! dos horas tomando fotos de lo que se atravesaba en mi camino! Y el resultado? unas fotos de final de otoño y Comienzo de Invierno!
Oto;o e Invierno acompanandose!
Tosay I posted some beautiful fall's pictures that I took last friday morning. I had an job counseling appointment and I´m not be able to drive in my Citymy husband took me there then I've got back home on foot. Thanks to my IPOD and Instagram many snaps were taken on my way. I really got some pictures of the ending season!
What do you like of each season?
martes, 22 de noviembre de 2011
Extreme Makeover Turquoise Bookcase
Hace unos meses, un Amigo se fue pueblo donde viviamos y nos dejo un viejo y bonito estante para poner libros. He estado intentando hacerle un cambio, asi que compre una pintura entre gris y beige pero se me venia a la mente una imagen como de cemento y no me convencia para el proyecto. Despues de pensar un mes y con todo este verano lleno de azules inspiradores ya me habia ubicado y decidi imprimirle un tierno y delicado azul turquesa. Empecemos!!
Materiales
Un Estante viejo
Periodicos para proteger el piso
Vinilo blanco para usar como base
Vinilo azul turquesa semibrillante (En mi caso estaba con gana de algo de ese color)
Brochas de esponja
Laca para terminado en spray color transparente
Instrucciones
1. Cubrir el piso con papel periodico para evitar que se dane y trabajar en una area bien ventilada
2. Limpiar bien la superficie con agua y jabon para estar seguro que este libre de particulas.
2. Con vinilo blanco se empieza a hacer la base.
3. Empezar con la pintura turquesa o de tu color favorito en este caso se escogio una semibrillante.
4. Dejar secar. (lo ideal es dejar secar las capas de un dia para otro).
5. Aplicar la laca transparente en spray.
5. Disfrutarla y esperar a disfrutarlo porque ese hermoso azul nunca pasara desapercibido!
Cuando termine y lo puse en la la note que la pintura de desprendia ligeramente debido a que la base del mueble era sintetica, resolvi el problema aplicando laca transparente en aerosol!! y problema solucionado.
Si tu mueble es de madera natural, es bueno quitar el color usando papel lija.
....................................................................................................................................................................
Many months ago A friend left us an old bookcase, I was planning make a change and bought a grey paint but the images that came to my head were so grey and I actually wanted my living room very warm and with colour.
Things you will need
An old and cheap bookcase.
Water based Semi-gloss turquoise paint or your colour wanted.
White acrylic paint.
News papers.
Foam brushes.
Aerosol spray lacquer for finishing.
Instructions.
1. Cover the floor with news papers and set your work in a well ventilated place.
2. Clean your bookcase with soap and water, then let it dry.
3. Add a coat of white acrylic base paint let it dry. (Over night would be perfect!!)
4. Add a coat of your favourite colour. A day before you will add the second one.
5. Spray with transparent lacquer.
6. Enjoy your bookcase and put cute decorations on it.
Did you like it?
miércoles, 16 de noviembre de 2011
Working all the time!!! Trabajando estoy
Hoy empezo mi semana ardua de trabajo, no hay nada que decir solo dejo unas imagenes de los aretes de Plumas de pavo real que acabe de hacer!!! la idea es postertolos en mi tienda Etsy!!! Estoy un poco nerviosa con todos los cambios que vienen para mi, espero me hagan bien!!!
Today Monday starts my hard work I don't want to talk about it just let some images about my work some Peacock Earrings that I was planning to make since 2 months ago... I've done !! My idea is stocking my Etsy store, I'm a little nervous about changes in my life coming soon!!
Suscribirse a:
Entradas (Atom)